How to Organize Photos Automatically: Folders, Names, Dates
Fix the date inside each photo, name files by that date, then sort them into year, month or place folders. The free manual way and the automatic way.
Most photo libraries grow the same way. A phone backup here, a camera card there, a Google Takeout export, an old laptop. After a few years you have one big folder of files called IMG_4471.jpg, and half of them show the wrong year.
This guide shows how to organize photos on your computer so they stay organized. It works on Mac, Windows and Linux. It covers the free way by hand, and the automatic way with our app, Takeout JSON Metadata Fixer. The pictures are small parts of the real app.
Why photo libraries get messy
Three things go wrong at once. The names mean nothing: IMG_4471.jpg, PXL_20230514.jpg, image(3).png. The folders follow the device, not your life. And the dates are often wrong, so sorting by date puts a 2014 holiday next to last week's receipts.
The dates are the root of it. Copying, downloading and exporting all reset the date a file shows on the outside. Photos from Google Takeout, chats and scans often lose the date inside the photo too.
The plan: dates first, then names, then folders
Do it in this order, because each step depends on the one before.
- Dates. Make sure every photo carries its real date taken.
- Names. Rename each file from that date, so the name sorts in time order.
- Folders. Sort the files into folders by year and month, by place or by trip.
If you rename and sort first, a wrong date puts a photo in the wrong folder with the wrong name. Fix the date and the other two steps follow from it.
The free way, by hand
For a few hundred photos you can do it yourself. On a Mac or on Windows, sort a folder by date taken, select one month, and drag it into a new folder like 2023/05. Repeat for each month. It is slow, but it costs nothing.
For more photos, the free tool exiftool can rename and sort in one command. Open a terminal in the folder and run:
exiftool '-FileName<DateTimeOriginal' -d '%Y/%m/%Y-%m-%d_%H%M%S%%-c.%%e' -r .That moves every photo into a year/month folder and names it by the date taken. A second command sets the file dates to the date taken:
exiftool '-FileModifyDate<DateTimeOriginal' '-FileCreateDate<DateTimeOriginal' -r .Two warnings. exiftool changes files where they are, so try it on a copy first. And it can only use a date that is already inside the photo. Photos with no date taken are left alone, and exiftool does not tell you which ones. For Google Takeout, the date sits in a separate .json file, and the exiftool way for Takeout is longer.
The automatic way: one run does all three
Takeout JSON Metadata Fixer does the dates, the names and the folders in one run, with buttons instead of commands. It runs on Mac, Windows and Linux, and your photos never leave your computer.
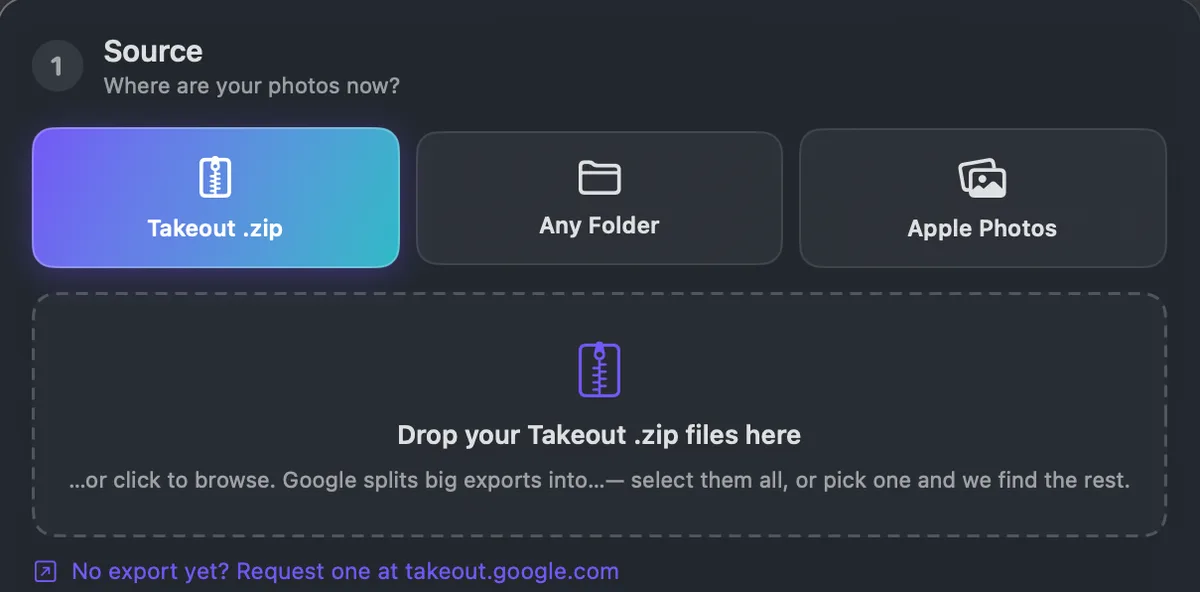
Choose Any Folder as the source for photos from an old drive, a camera card or another phone. Choose Takeout .zip for a Google Takeout export. On the Mac, Apple Photos can be the source too. See run it on any photo folder.
Then pick a naming style and a folder style. The line under the two menus shows where one real photo will end up. Here, a photo becomes 2024/03-March/2024-03-15-1430_Paris.jpg.

The sections below go through each part of that run.
Sort photos into folders automatically
The Folders menu decides the photo folder structure. You can sort by year and month, by year, month and day, or by year only. You can sort by year and place, by place and year, or by year and trip. You can also keep the folders you already have, or use no folders at all.
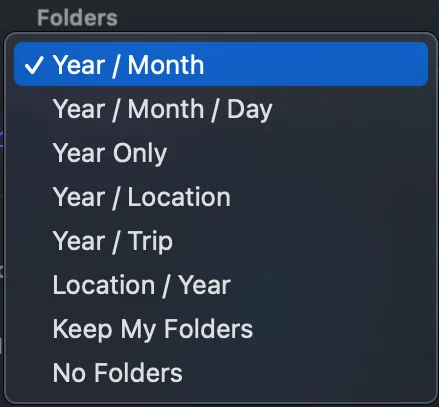
Year / Month suits most libraries. It is easy to browse and easy to back up one year at a time. Year and month folders compares it with the other structures.
Year / Location and Location / Year put place names like Paris into the folder names. The photo's GPS position turns into a city name. That lookup needs the internet, and only the rough coordinates are sent. Leave the switch off and the app uses no internet at all. See photos in folders by location.

Year / Trip puts photos taken close together in time and place into one folder, like 2024/Paris.

You decide what counts as a trip: how many photos, within how many days, and how far apart.

Rename photos by date taken
A good file name starts with the date. 2024-03-15-1430_Paris.jpg sorts in time order in every file manager, and it tells you what the photo is before you open it.
The Filenames menu has four styles: date and time with the place, date and time only, the original name with the date and time, or the original name unchanged.
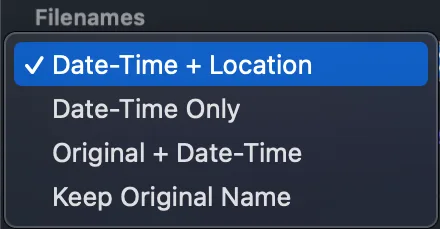
You can also add your own word in front of or behind every name: a family name, a trip, an archive code. See rename photos by date taken in bulk and add your own text to file names.

Fix the photo creation date
A photo has more than one date, and this is where most confusion starts.
The date taken lives inside the photo, in its EXIF data. Photo apps like Apple Photos, Google Photos and Immich sort by it. The file dates (created and modified) live on the outside, in the file system. Finder and Windows Explorer show them, and they change when you copy or download a file. EXIF date taken vs file modified explains all three.
The app fixes both. It writes the real date and time into the photo, and it sets the file dates to match. So your photo app and your file manager agree.
Where does the real date come from? For a Google Takeout export, from each photo's .json file. For any other folder, it takes the best date it can find: the .json file when there is one, then the date already inside the photo, then the file date. Nothing comes out blank.
Some photos have no date worth trusting, like scans of old prints. For those, choose Any Folder and turn on Set the date and place myself. Type a date, a place, or both, and every photo in that folder gets it. See fix dates on scanned photos.

Separate screenshots from photos
Screenshots, memes and photos of receipts bury the photos you care about. Two switches move them aside.
Screenshots into their own folder sends anything captured off a screen into a Screenshots folder, named with a Screenshot suffix. Documents into their own folder does the same for scans and photos of paper, like receipts, letters and whiteboards. Documents are recognized by how they look, so expect the odd miss.

Each switch has a second choice. The files can go into a folder inside your new library, or join the central Pictures/Screenshots and Pictures/Documents folders on your computer. Keep screenshots out of your photo library explains how screenshots are recognized.
Add to a library you already have, without duplicates
You rarely organize everything at once. First a Takeout export, then an old phone, then a folder from a USB stick. Choose your existing library as the destination each time.

Photos that are already in that library are skipped, so you do not get two of everything. The app recognizes a photo by its content, not by its name, so a renamed copy is still caught. Merge two photo libraries without duplicates goes deeper.
Live Photos
An iPhone Live Photo is a still photo and a short video with the same name. If a rename or a sort splits them, your photo app can no longer pair them.
You choose what happens. Keep the clip beside the photo with the same name, keep the photo only, or merge both into one Motion Photo file, the format Android galleries play.

Preview everything with a dry run
Before you change thousands of files, look first. Dry run shows every new name, every folder and every date change, and writes nothing. It does not count against the 1000 free photos.

For a very large library, you can also do one year first with Only photos from a date range. Check it, then do the rest. How to organize 50,000 photos has more tips for big libraries.

Organize a folder in place, or into a new folder
By default the app writes an organized copy into a new folder. Your original files stay as they were. To go back, delete the new folder.
When the source is Any Folder, you can also choose Same folder: reorganize it in place. The photos are rewritten where they are, with new names, fixed dates and the folders you chose. There is no undo for this. Turn on Keep the old files in a subfolder and every replaced original moves into an Originals folder instead of being deleted. That is safe, but the folder takes twice the space until you clear it out.
If your folders and names are already the way you like them, pick Keep My Folders and Keep Original Name. The dates get fixed and nothing is renamed or moved. See does this work if my photos are already organized.
Check the result
At the end you see how many photos were organized, converted and located, and how many had an issue. Any file the app could not match is listed by name.
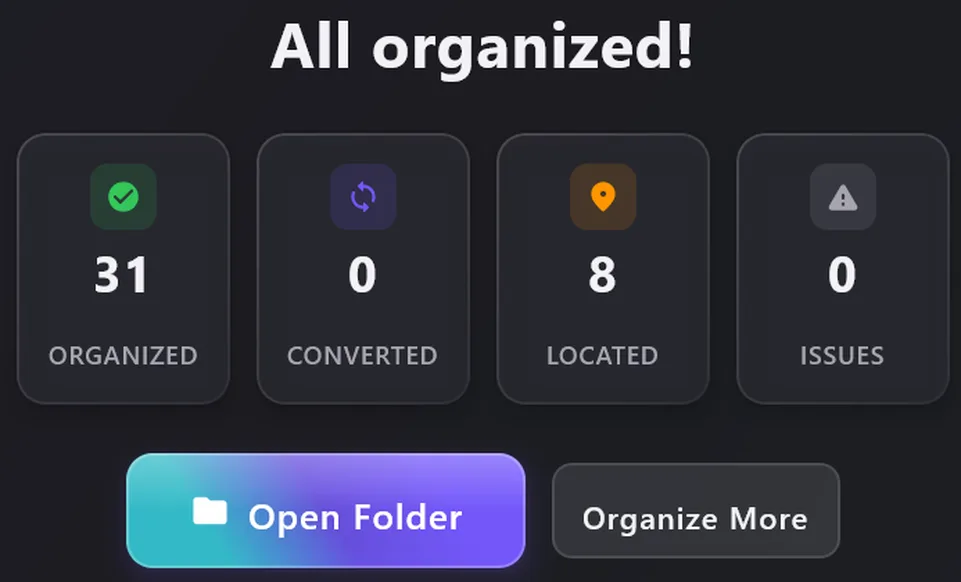
Open the folder and look at a few photos from different years. Check the date taken and the place in your file manager or photo app. How to check that photo dates are fixed shows where to look on each system. When you are happy, copy the library to a second drive.
The app is free for your first 1000 photos, with every feature except export to an Android phone. Premium is a single payment of $19.99 (US dollars; stores show your local price) for unlimited photos, with no subscription and no account.
FAQ
What is the best folder structure for photos?
For most people, year and then month: 2024/03-March. It sorts in time order and never needs a decision about where a photo belongs. Travel photos read well by year and place, or by trip.
How do I organize photos by date when the dates are wrong?
Fix the date taken first, then rename and sort. If you sort by a wrong date, the photo goes into the wrong folder. For Google Takeout, the right date is in the .json file next to each photo.
Does renaming a photo change its date?
No. Renaming changes only the name. The date taken inside the photo and the file dates stay the same.
Will organizing my photos change the originals?
Not by default. The app writes a new, organized copy and leaves the originals as they were. Only the in-place option changes the original folder, and it can keep the old files in an Originals subfolder.
Do I need the internet to organize photos?
No. Everything happens on your computer and nothing is uploaded. Only place names like Paris need a lookup, and you can leave that switch off. See how the app keeps your photos private.